Power BI is a powerful business intelligence tool that allows users to visualize and analyze data from various sources. One of the key steps in utilizing Power BI is connecting it to a data source. In this blog post, we will walk you through the process of connecting to a data source in Power BI, step by step.
Step 1: Launch Power BI
- To begin, open Power BI on your computer. If you don’t have it installed, you can download it from the official Microsoft website. Power BI is available as a desktop application for Windows, as well as a web-based version.
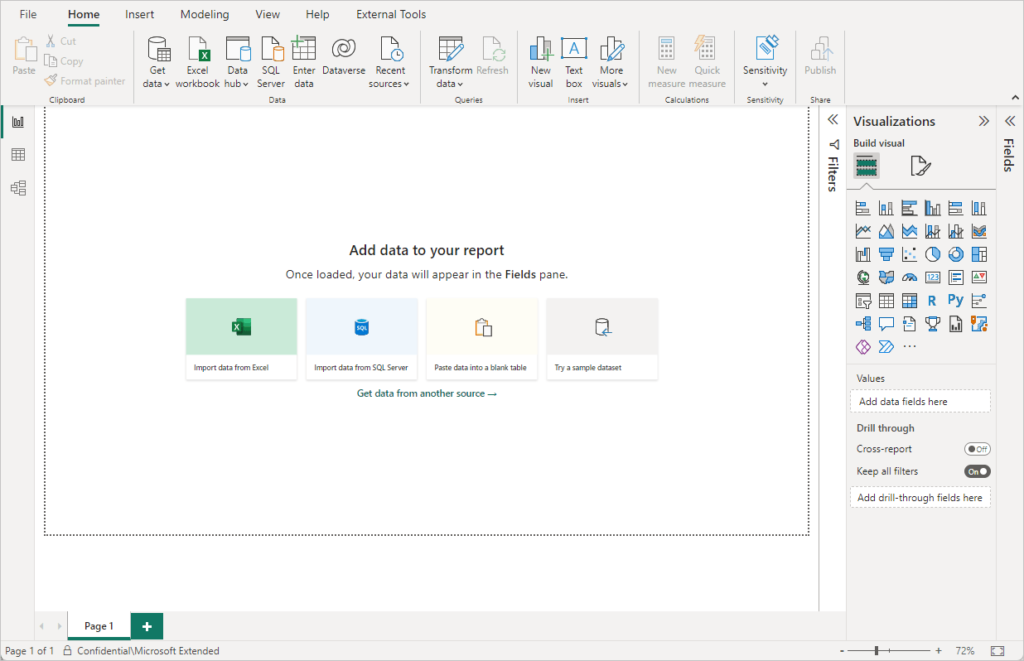
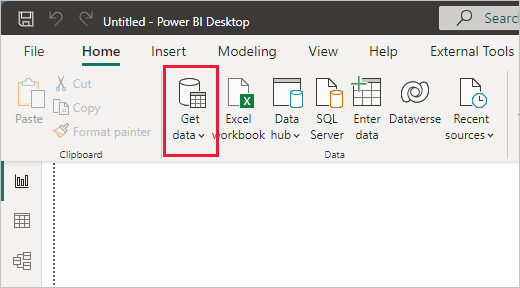
Step 2: Click on "Get Data"
- Once you have launched Power BI, you will see a home screen with several options. Look for the “Get Data” button, which is prominently displayed. Click on it to start the data connection process.
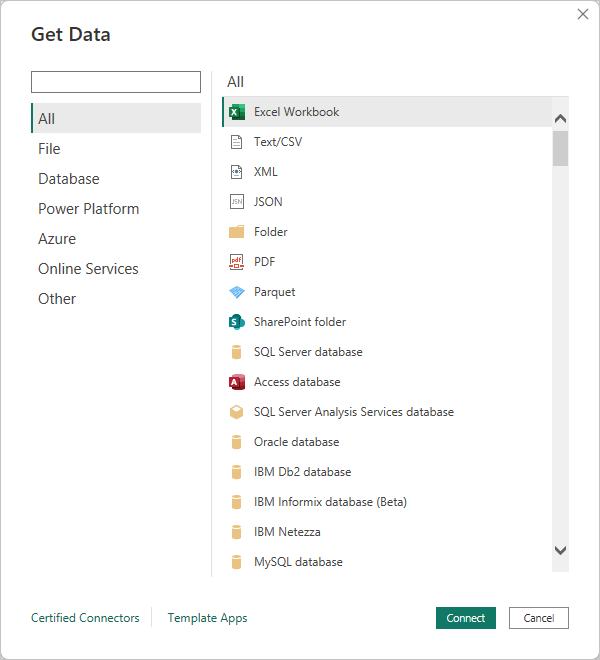
Step 3: Choose a Data Source
- Power BI offers a wide range of data sources to connect to, including databases, files, online services, and more. Select the data source that contains the information you want to analyze. For example, you can connect to Excel files, SQL databases, SharePoint lists, or even online services like Salesforce.
Step 4: Provide Connection Details
- After selecting your data source, you will be prompted to provide the necessary connection details. This will vary depending on the type of data source you chose. For example, if you are connecting to a SQL database, you will need to provide the server name, database name, and credentials.
Step 5: Transform and Load Data (Optional)
- Once you have established a connection to your data source, you may want to perform some transformations on the data before loading it into Power BI. This step is optional but can be useful if you need to clean or shape the data. Power BI provides a range of data transformation tools to help you achieve this.
Step 6: Load Data into Power BI
- Once you are satisfied with the data connection and any necessary transformations, click on the “Load” button to import the data into Power BI. The data will be loaded into the Power Query Editor, where you can further refine it if needed.
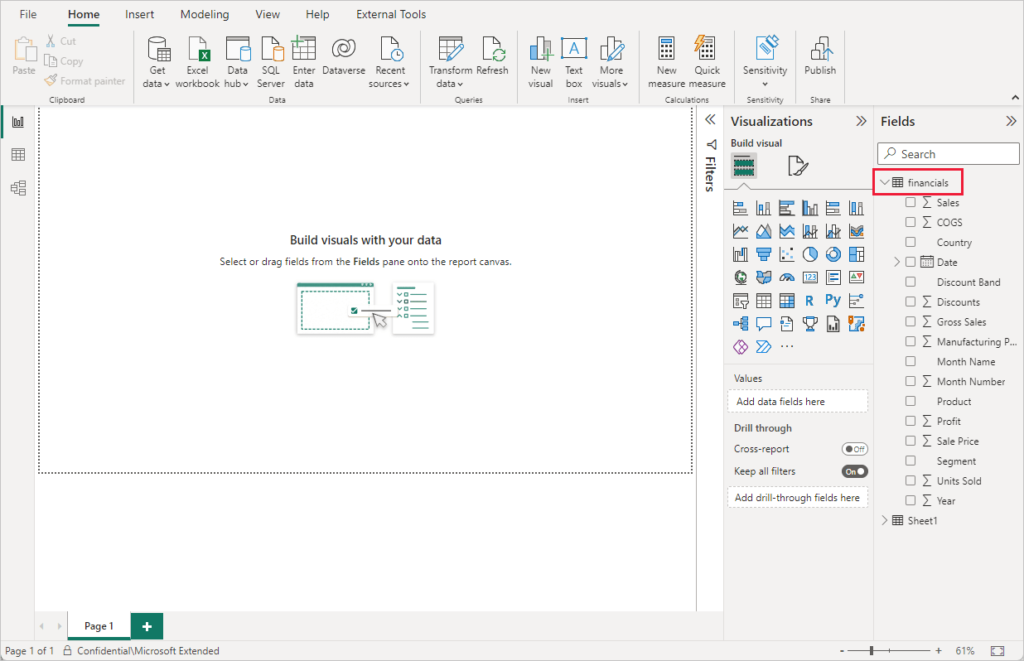
Step 7: Create Visualizations
- With your data successfully loaded into Power BI, you can now start creating visualizations to gain insights. Power BI offers a wide range of visualization options, including charts, graphs, tables, and maps. Drag and drop fields from your data onto the canvas to create visual representations of your data.
Step 8: Refresh Data (Optional)
- If your data source is dynamic and regularly updated, you may want to set up an automatic data refresh schedule. This ensures that your Power BI reports and dashboards always display the latest information. Power BI provides options to schedule data refreshes from various sources, depending on your requirements.
- Connecting to a data source in Power BI is a crucial first step in unlocking the full potential of this powerful tool. By following the steps outlined above, you can seamlessly integrate your data into Power BI and unleash its capabilities for analysis and visualization.
- Remember, Power BI supports a wide range of data sources, so you can connect to popular services like Microsoft Excel, SQL databases, online services, and many more. Experiment with different data sources to get the most out of your Power BI experience.
Key Takeaways
- Power BI is a powerful business intelligence tool that allows users to visualize and analyze data from various sources.
- The process of connecting to a data source in Power BI involves launching Power BI, clicking on “Get Data,” choosing a data source, providing connection details, optionally transforming the data, loading it into Power BI, creating visualizations, and optionally setting up data refresh.
- Power BI supports a wide range of data sources, including databases, cloud services, online services, files, and more. Whether you need to connect to an Excel spreadsheet, a SQL Server database, or a web API, Power BI has you covered.
Conclusion
- Connecting to a data source in Power BI is a straightforward process that involves launching the application, selecting the desired data source, providing connection details, optionally transforming the data, loading it into Power BI, creating visualizations, and optionally setting up data refresh. With Power BI’s extensive support for various data sources, you can easily analyze and gain insights from your data to make informed business decisions.